Google Analytics Integration
Google Analytics Integration
Integrate Funnel Leasing widgets with Google Tag Manager and Google Analytics to track widget events and conversions
Funnel Leasing widgets can be integrated with Google Analytics in two ways:
- Google Tag Manager (GTM) - For Lead Form and Appointment Scheduler widgets, use GTM to track form submissions
- Google Analytics 4 (GA4) - For the Chatbot widget, use GA4 to track chatbot interactions and events
Implemented by the Funnel widget scripts, not Funnel's backend API
onComplete callback, the enableGAEvents flag, and every chatbot event name below — is implemented inside the hosted widget/chatbot JavaScript bundles that Funnel serves to your page, not in Funnel's backend API. That means this page's accuracy depends on the widget scripts' current behavior, which can't be verified the same way the rest of this site's API documentation is. If an event listed here doesn't fire as described, confirm current behavior directly (GTM Preview mode, GA4 Realtime, or your browser's network/console tools) rather than assuming this page is out of date, or assuming the widget itself is broken without checking.The Funnel Appointment Scheduling and Lead Widget use iframes to display their content, which ensures they don't affect the page in which they are embedded. However, Google Tag Manager cannot track content within iframes by default.
To solve this, the widgets accept an onComplete callback which executes an arbitrary JavaScript callback when the widget is submitted. You can then interface with Google Tag Manager by creating a custom event and using the dataLayer API to trigger it.
Basic Integration
Add the onComplete callback to your widget initialization code:
GTM Step-by-Step Guide
Follow these steps to set up Google Tag Manager tracking for your widgets:
- Step 1: Install Google Tag Manager - Ensure the script tags for Google Tag Manager are included on the page where you've embedded the Funnel widget. If not, follow the steps on the Google Tag Manager quickstart guide.
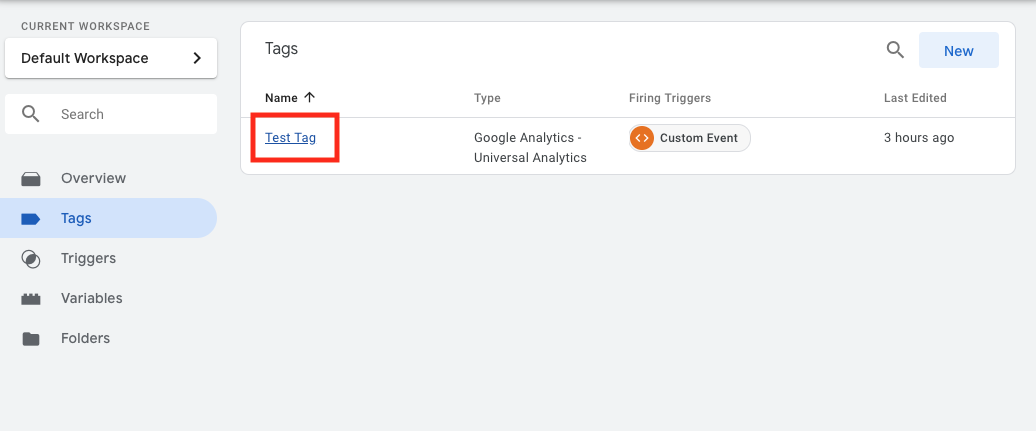
- Step 2: Select Your Tag - In the Google Tag Manager Workspace View, select the Tag you want to use for tracking widget submissions.
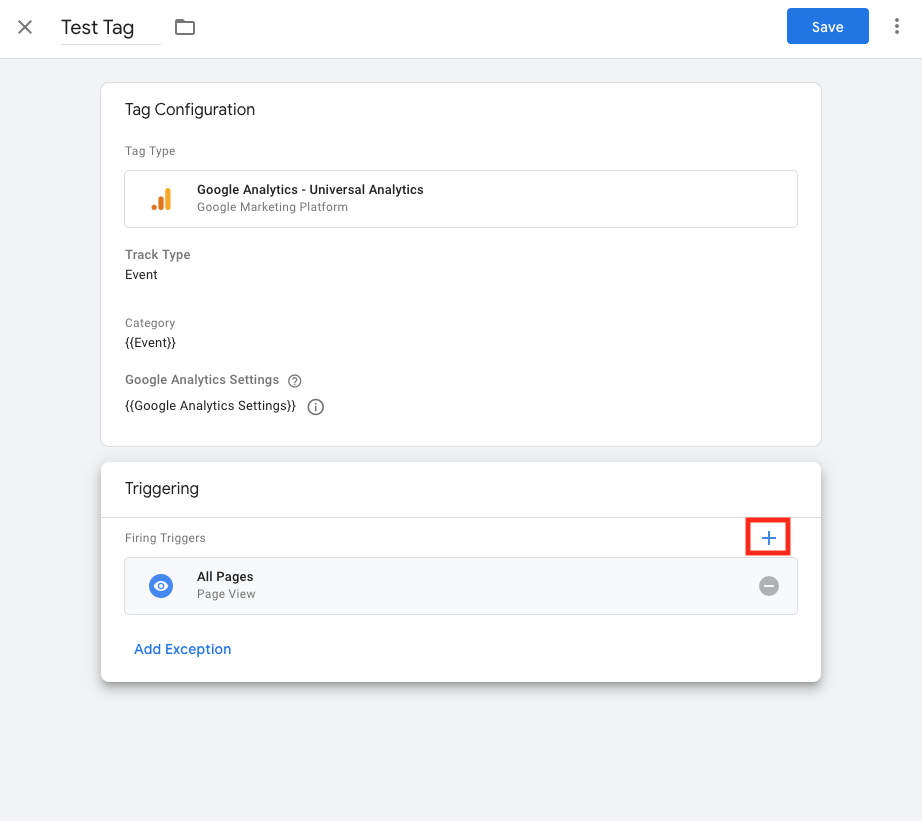
- Step 3: Add a New Trigger - In the Tag view, select the button to add a new Trigger.
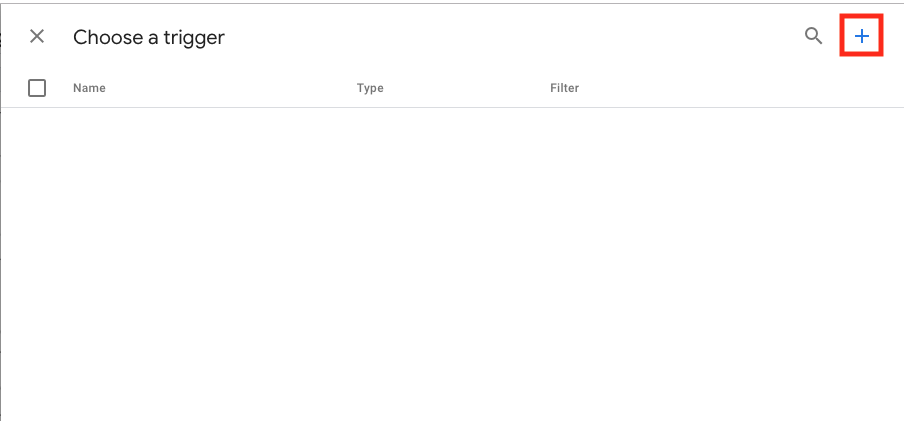
- Step 4: Create a Custom Event Trigger - In the Choose a trigger pop-up, select Add new.
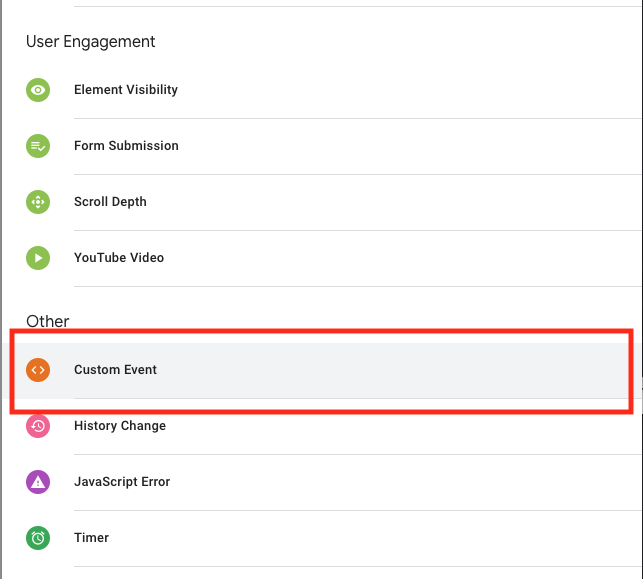
- Step 5: Select Custom Event Type - In the trigger type selection, choose Custom Event (under "Other").
- Step 6: Configure the Trigger - Create the configuration for the custom event. In this case, we want the Tag to fire only when we trigger the custom event from our JavaScript, so we add a condition to only fire when the event contains the name
lead-form-submission. - Step 7: Add Callback to Widget - In the Funnel Widget embed code, add the following callback, which triggers the event we've created above:
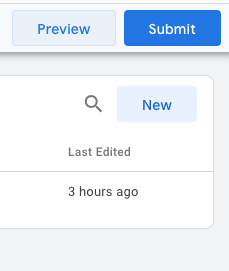
- Step 8: Test and Publish - Use Google Tag Manager's Preview mode to test that the event fires correctly. Make sure to either Preview or Submit the Tag Workspace and you should be all ready to go. Your Tag should now fire when the widget is submitted.
To emit chatbot events into your GA4 account, you need to add your GA4 tracking ID (which appears in the format G-XXXXXXXXXX) into the <head> of the HTML file where you have inserted the chatbot script.
Basic Integration
Add the GA4 tracking ID and enable GA events in your chatbot initialization:
MEASUREMENT_ID_HERE with your GA4 Measurement ID (format: G-XXXXXXXXXX). Set enableGAEvents: true in the chatbot initialization to enable event tracking.GA4 Step-by-Step Guide
Follow these steps to set up Google Analytics 4 tracking for your chatbot:
- Step 1: Sign in to Google Analytics - Sign in to the Google Analytics website with the appropriate Google account.
- Step 2: Access Admin Settings - Once logged in, click on Admin in the lower left corner.
- Step 3: Create a Property - Click the + Create button in the top left. Click to create a property. Follow the initial setup process.
- Step 4: Set Up a Data Stream - After setting up the property, you will be asked to set up a Data Stream. Select Web as the platform. You will be provided with a Measurement ID and a Stream ID.
- Step 5: Copy the Measurement ID - Copy the Measurement ID (format:
G-XXXXXXXXXX), and insert it in your code as outlined in the Basic Integration section above. - Step 6: Verify Data Reception - Check your Google Analytics dashboard to see if data is being received. Go to the Realtime section of your Google Analytics dashboard. Under Events, you should see
Chatbot_interactionas an event category.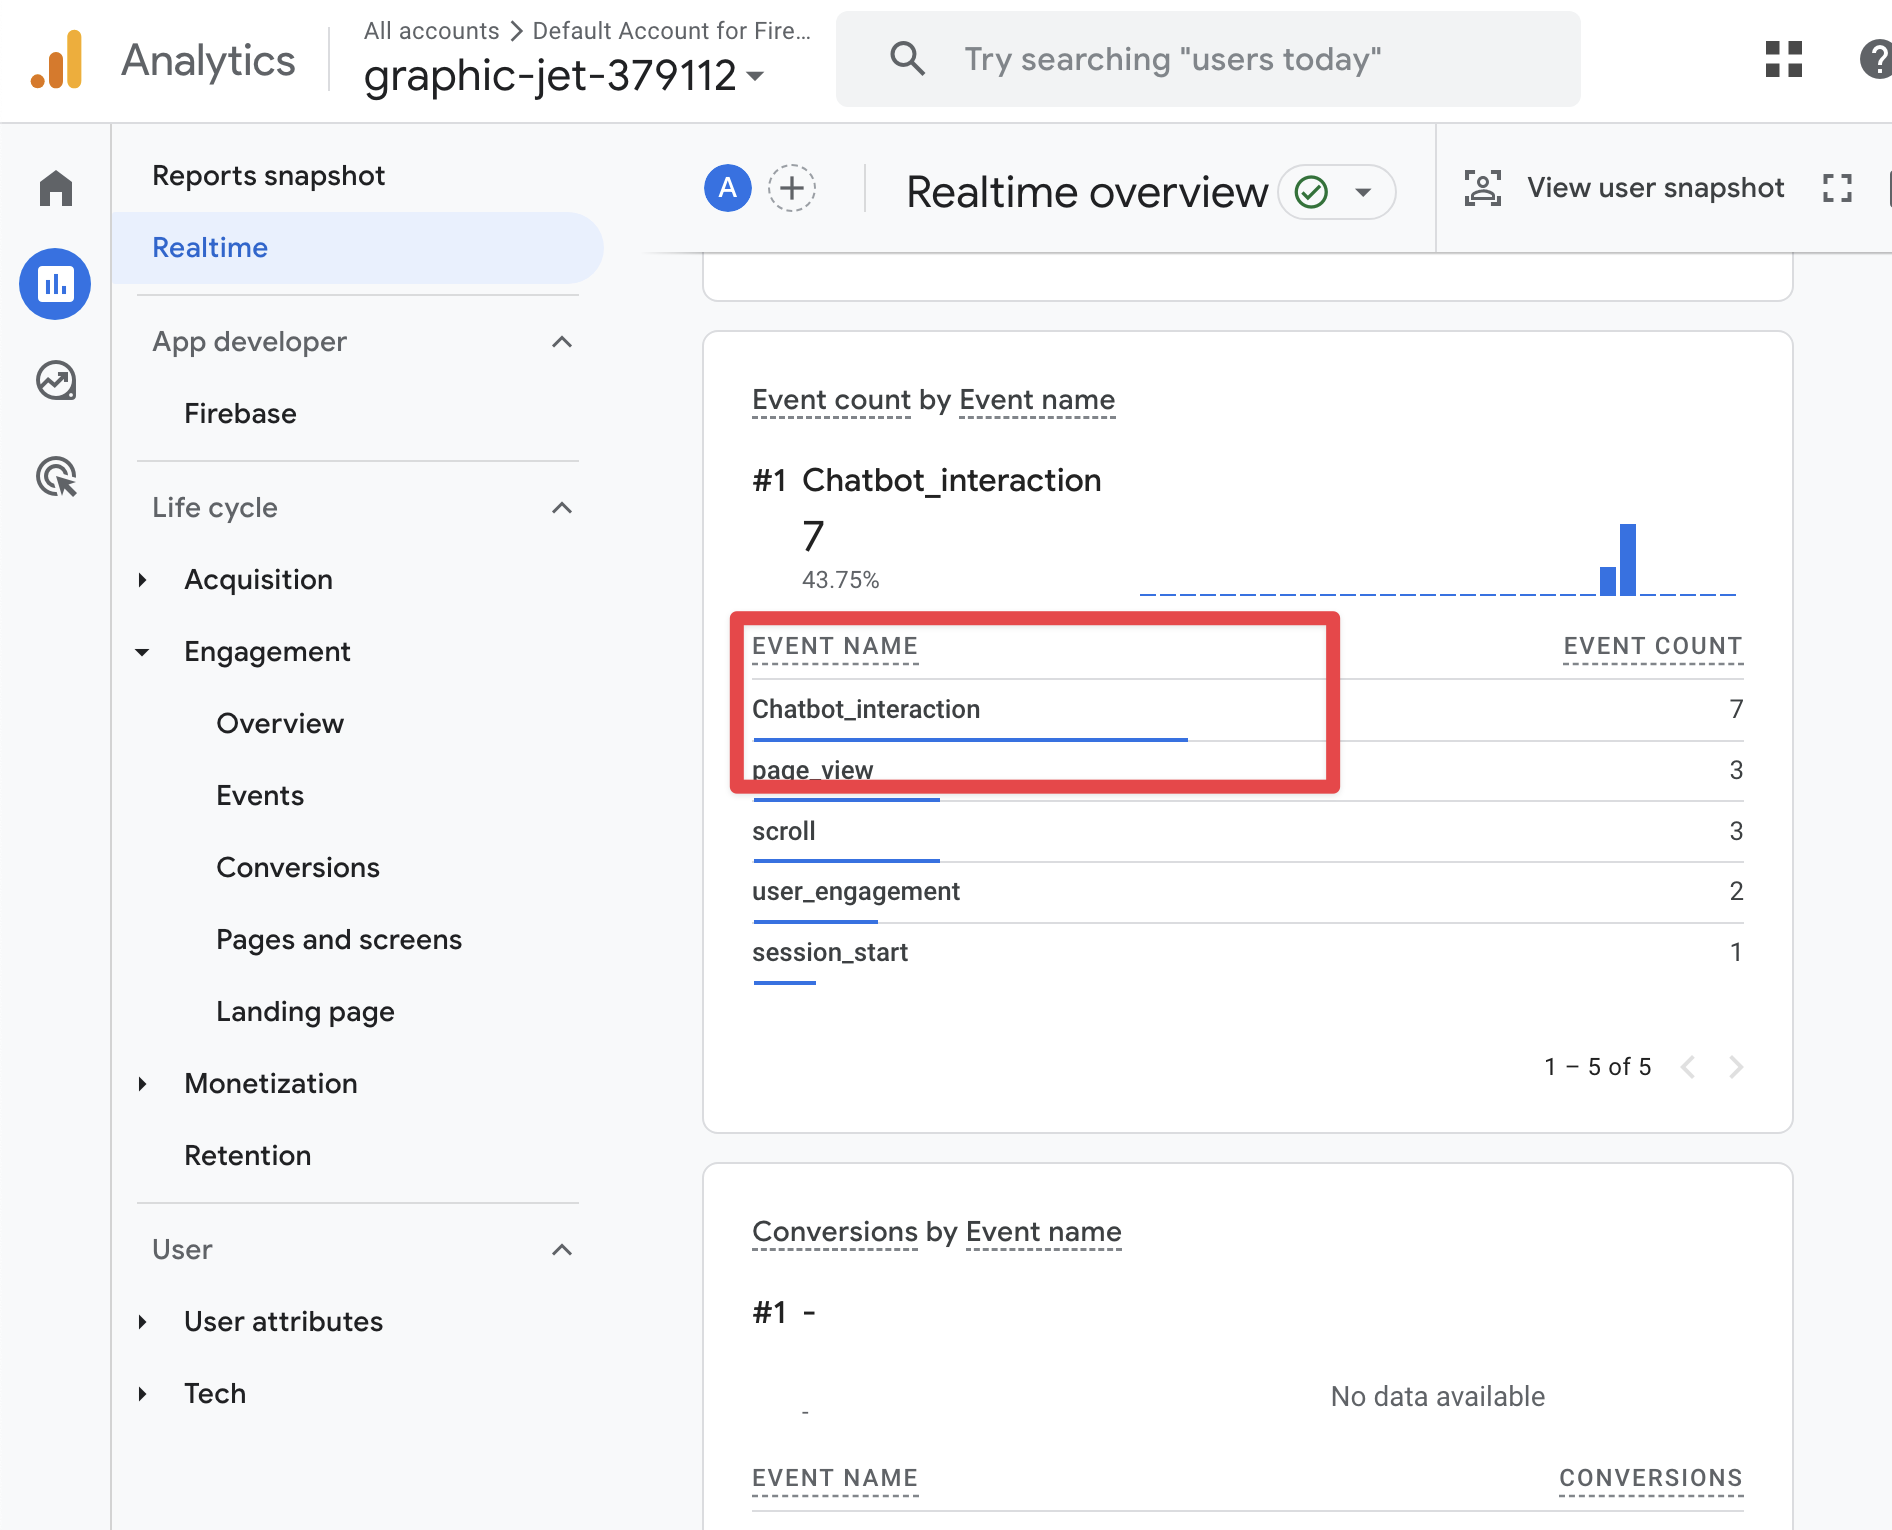
- Step 7: View Event Details - Click through to the
event_labelparameter where you will see the individual event types.
Chatbot Event Types
The chatbot widget emits the following event types for user interactions, which can be found under the event_label parameter in Google Analytics:
| Event Type | Description |
|---|---|
open_chatbot | User clicked the chat bubble to open the panel |
close_chatbot | User clicked the X icon to close the panel |
close_welcome_message | User closed the initial pop-up message on page load |
button_click | User clicked a button provided by the virtual agent |
live_chat_message_sent | User sent a message in live chat with agent |
chatbot_message_sent | User sent a message to the virtual agent |
select_contact_form | User clicked through to the contact form provided by the virtual agent |
form_submit | User submitted a PII form provided by the virtual agent |
message_link_click | User clicked a link provided by the virtual agent |
list_show_more_click | User clicked the "show more" button in a list provided by the virtual agent |
refresh_chat | User clicked the refresh button in the chat panel to restart the conversation |
GTM Events Not Firing
- Check dataLayer - Verify that
dataLayeris defined and accessible on the page - Verify callback - Ensure the
onCompletecallback is properly formatted and executed - GTM Preview - Use GTM's Preview mode to debug event firing
- Console errors - Check the browser console for JavaScript errors
GA4 Events Not Appearing
- Verify Measurement ID - Ensure the GA4 Measurement ID is correct and set in the
<head>section - Check enableGAEvents - Confirm
enableGAEvents: trueis set in the chatbot initialization - GA4 Realtime - Check the Realtime section in GA4 to see if events are being received
- Network tab - Check the browser's Network tab to see if requests are being sent to Google Analytics
Common Issues
| Issue | Solution |
|---|---|
| GTM events not firing | Verify dataLayer is loaded before widget initialization |
| GA4 events not appearing | Check that GOOGLE_ANALYTICS_TRACKING_ID is set in the <head> and enableGAEvents: true is set |
| Events delayed or missing | Ensure scripts load in the correct order and page is fully loaded |
| Duplicate events | Check that callbacks are not being triggered multiple times |
- Load order - Ensure Google Tag Manager or GA4 scripts load before widget scripts
- Error handling - Wrap callbacks in try-catch blocks to prevent errors from breaking widgets
- Event naming - Use consistent, descriptive event names across your site
- Testing - Always test integrations in a staging environment before deploying to production
- Documentation - Document your event structure and naming conventions for your team
If you have questions about integrating widgets with Google Analytics or need assistance with configuration, please contact:
- Customer Support: support@funnelleasing.com
- Your Account Representative: Reach out to your assigned Funnel Leasing account representative